GraphMind
GraphMind AI Assistant
GraphMind is an advanced AI research assistant leveraging LangGraph for agent orchestration and Neo4j to construct and query a knowledge graph of research papers. This repository contains the codebase and setup instructions for deploying GraphMind locally.
Table of Contents
- Features
- GraphMind Agent Architecture
- Requirements
- Clone the Repository
- Container Setup
- Setup Instructions
- Running the Application
- Future Updates
- References
Features
- Constructs a knowledge graph from a corpus of documents.
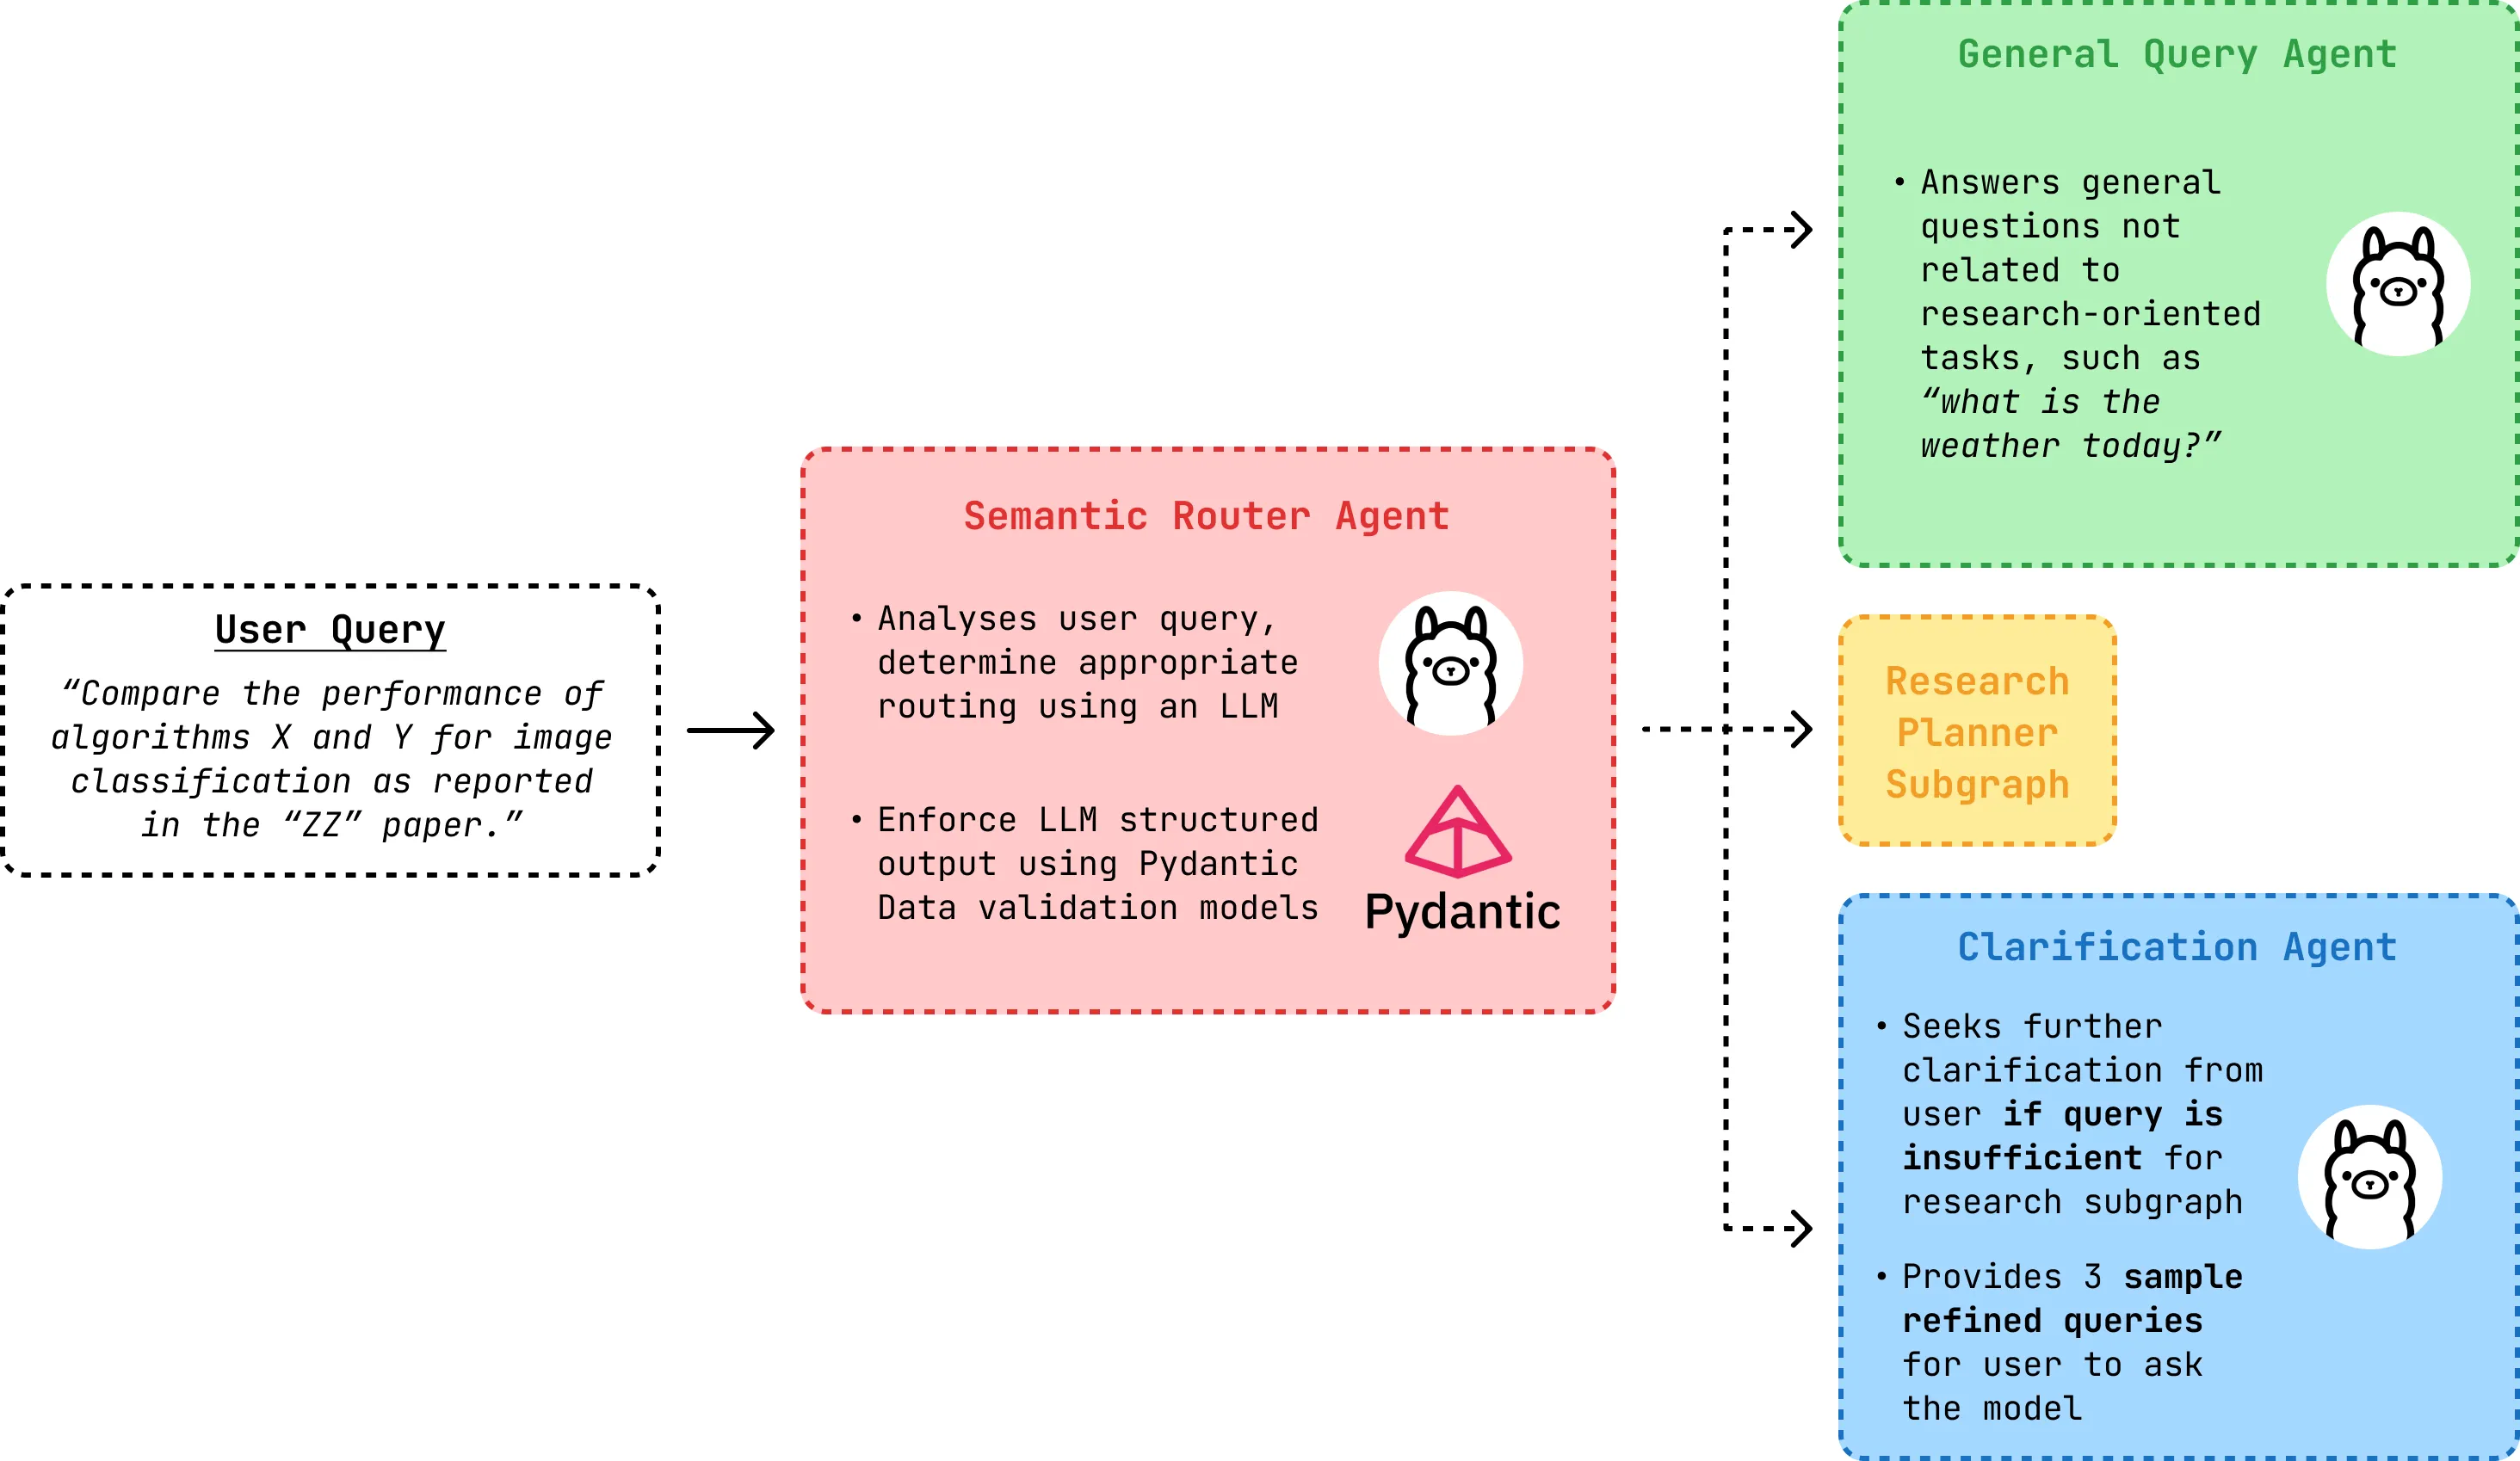
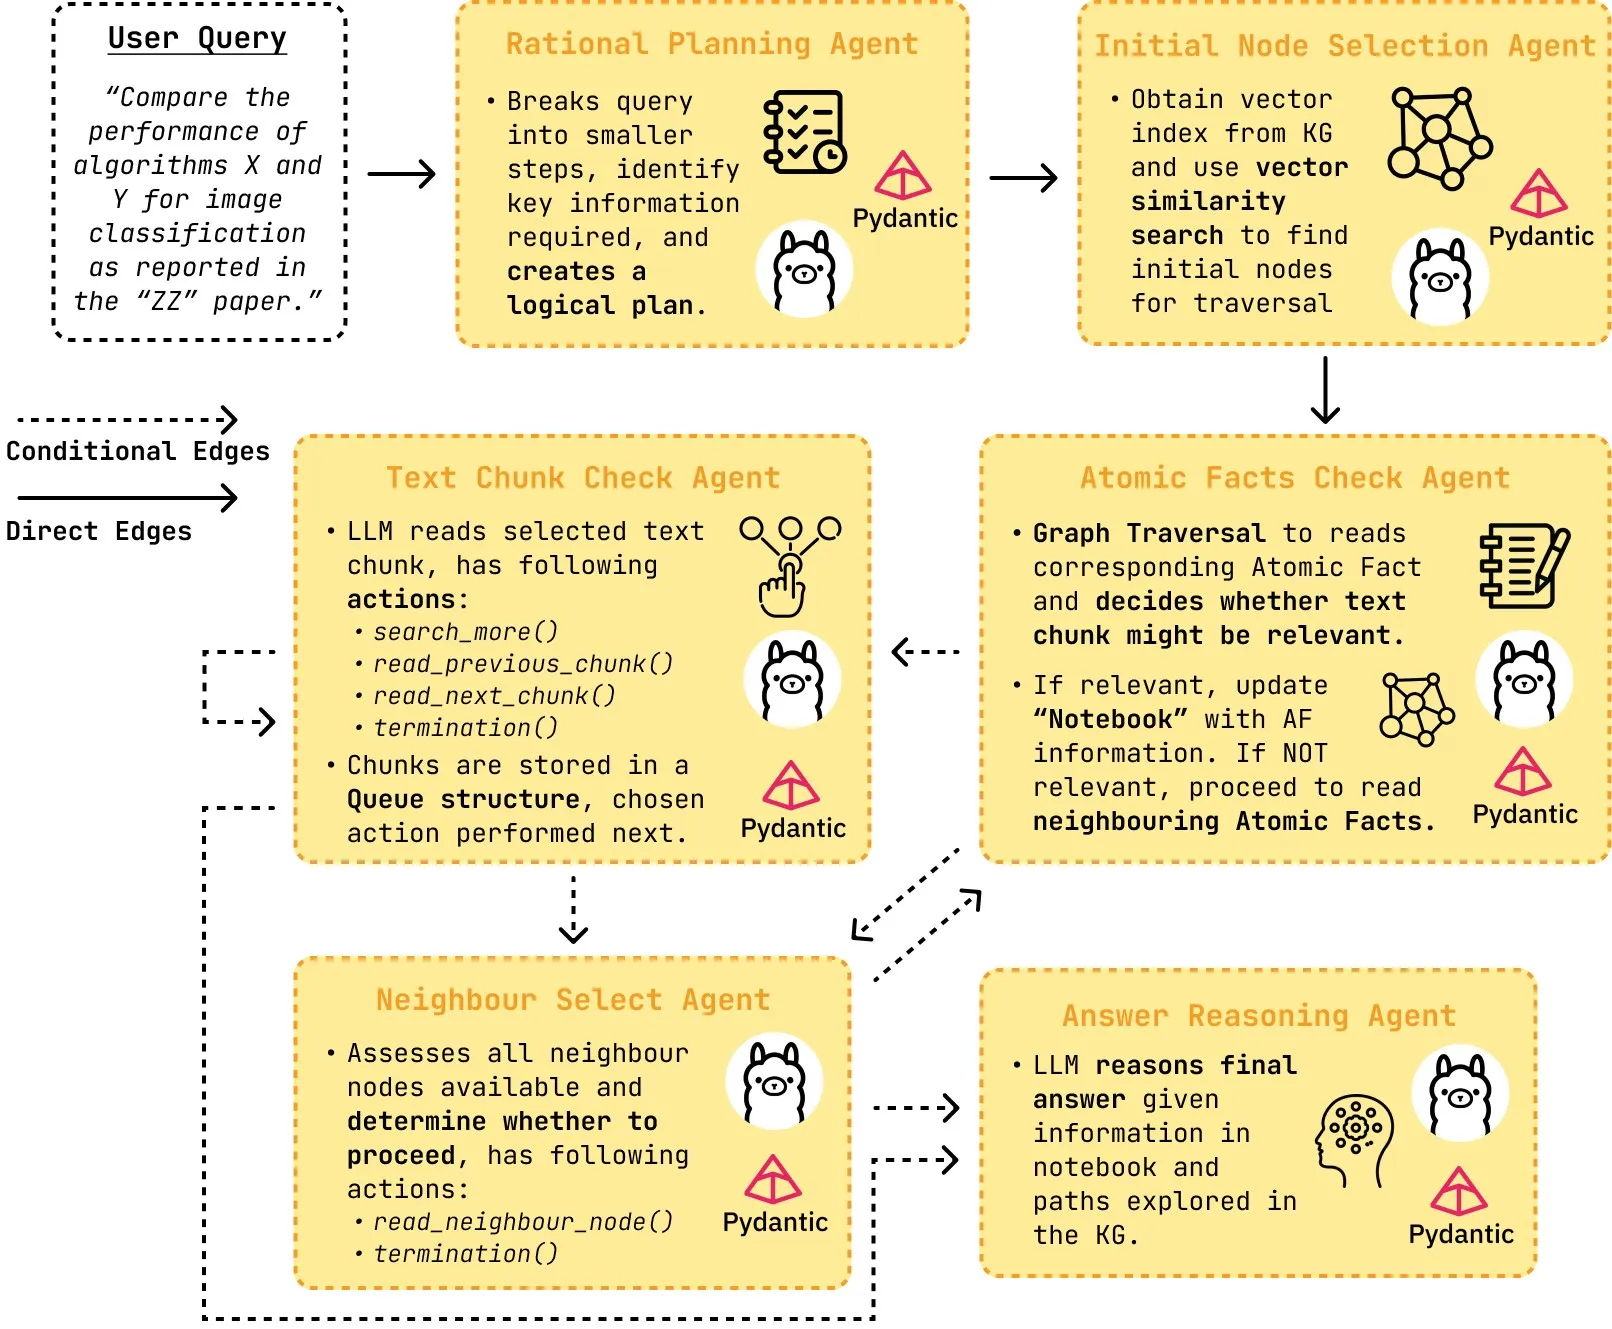
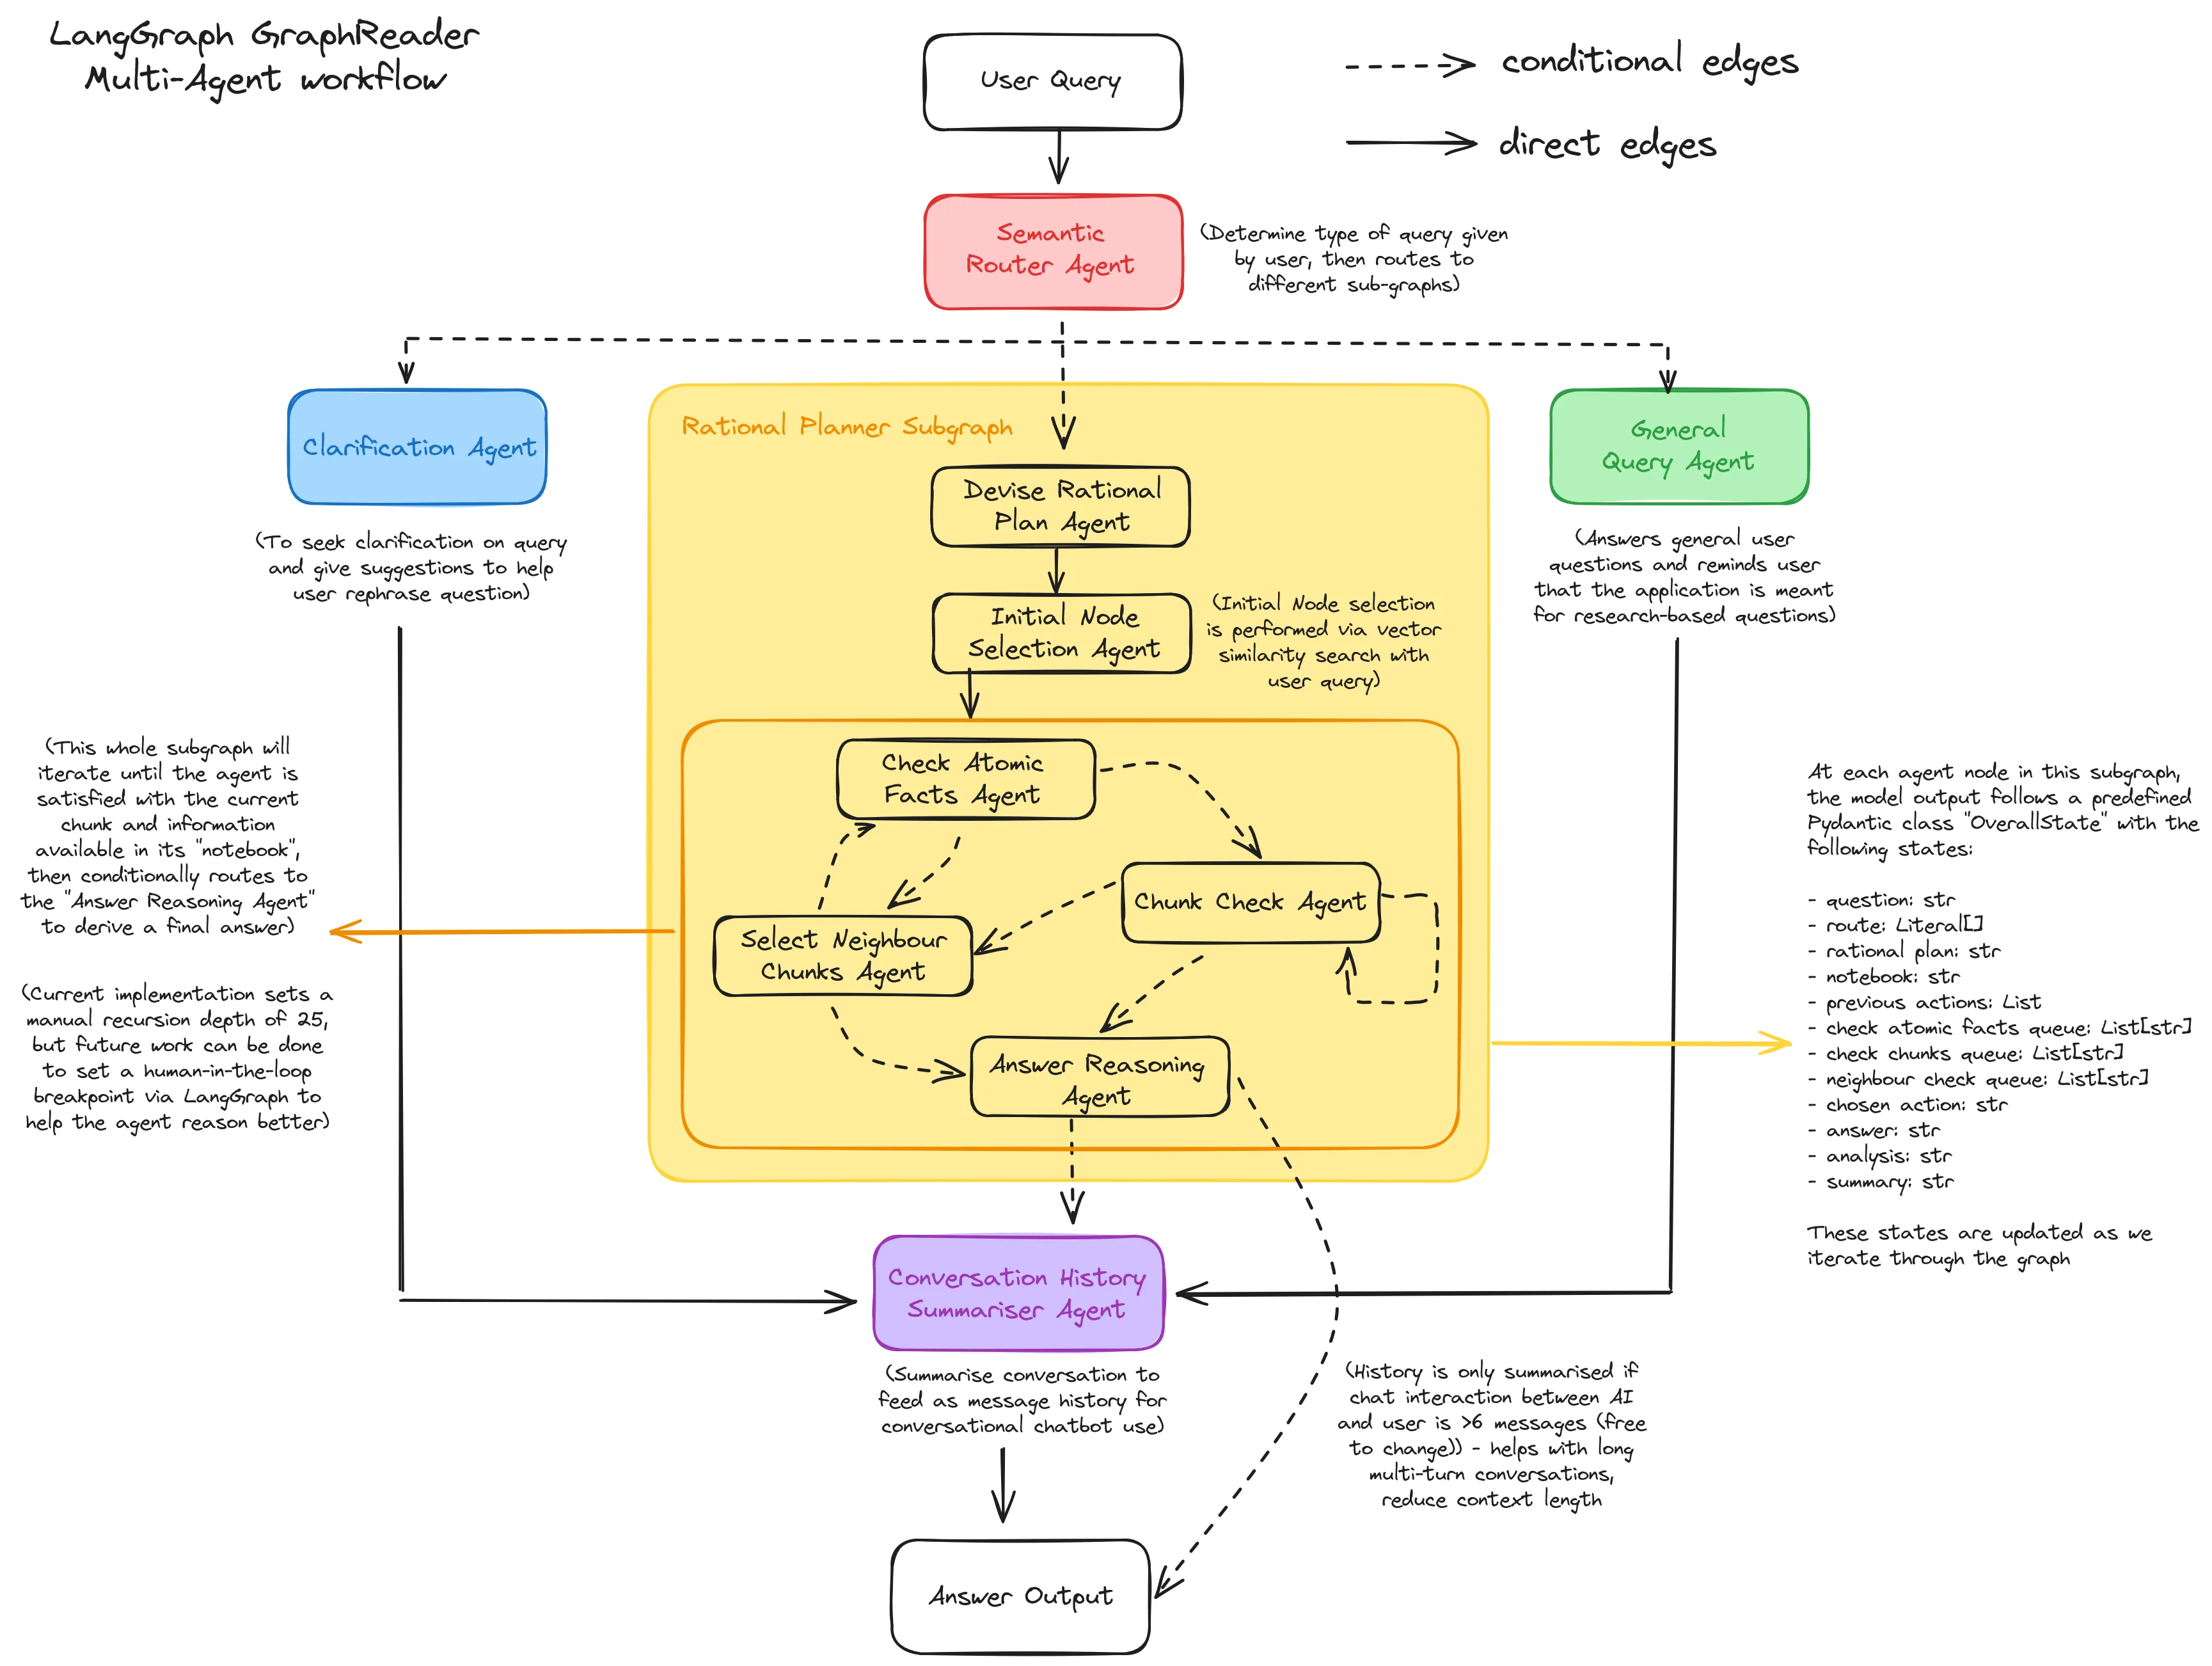
- Provides agentic planning & reasoning using LangGraph, based on the Graphreader paper.
- Agent will traverse knowledge graph database and update its “notebook” with relevant information to answer user queries.
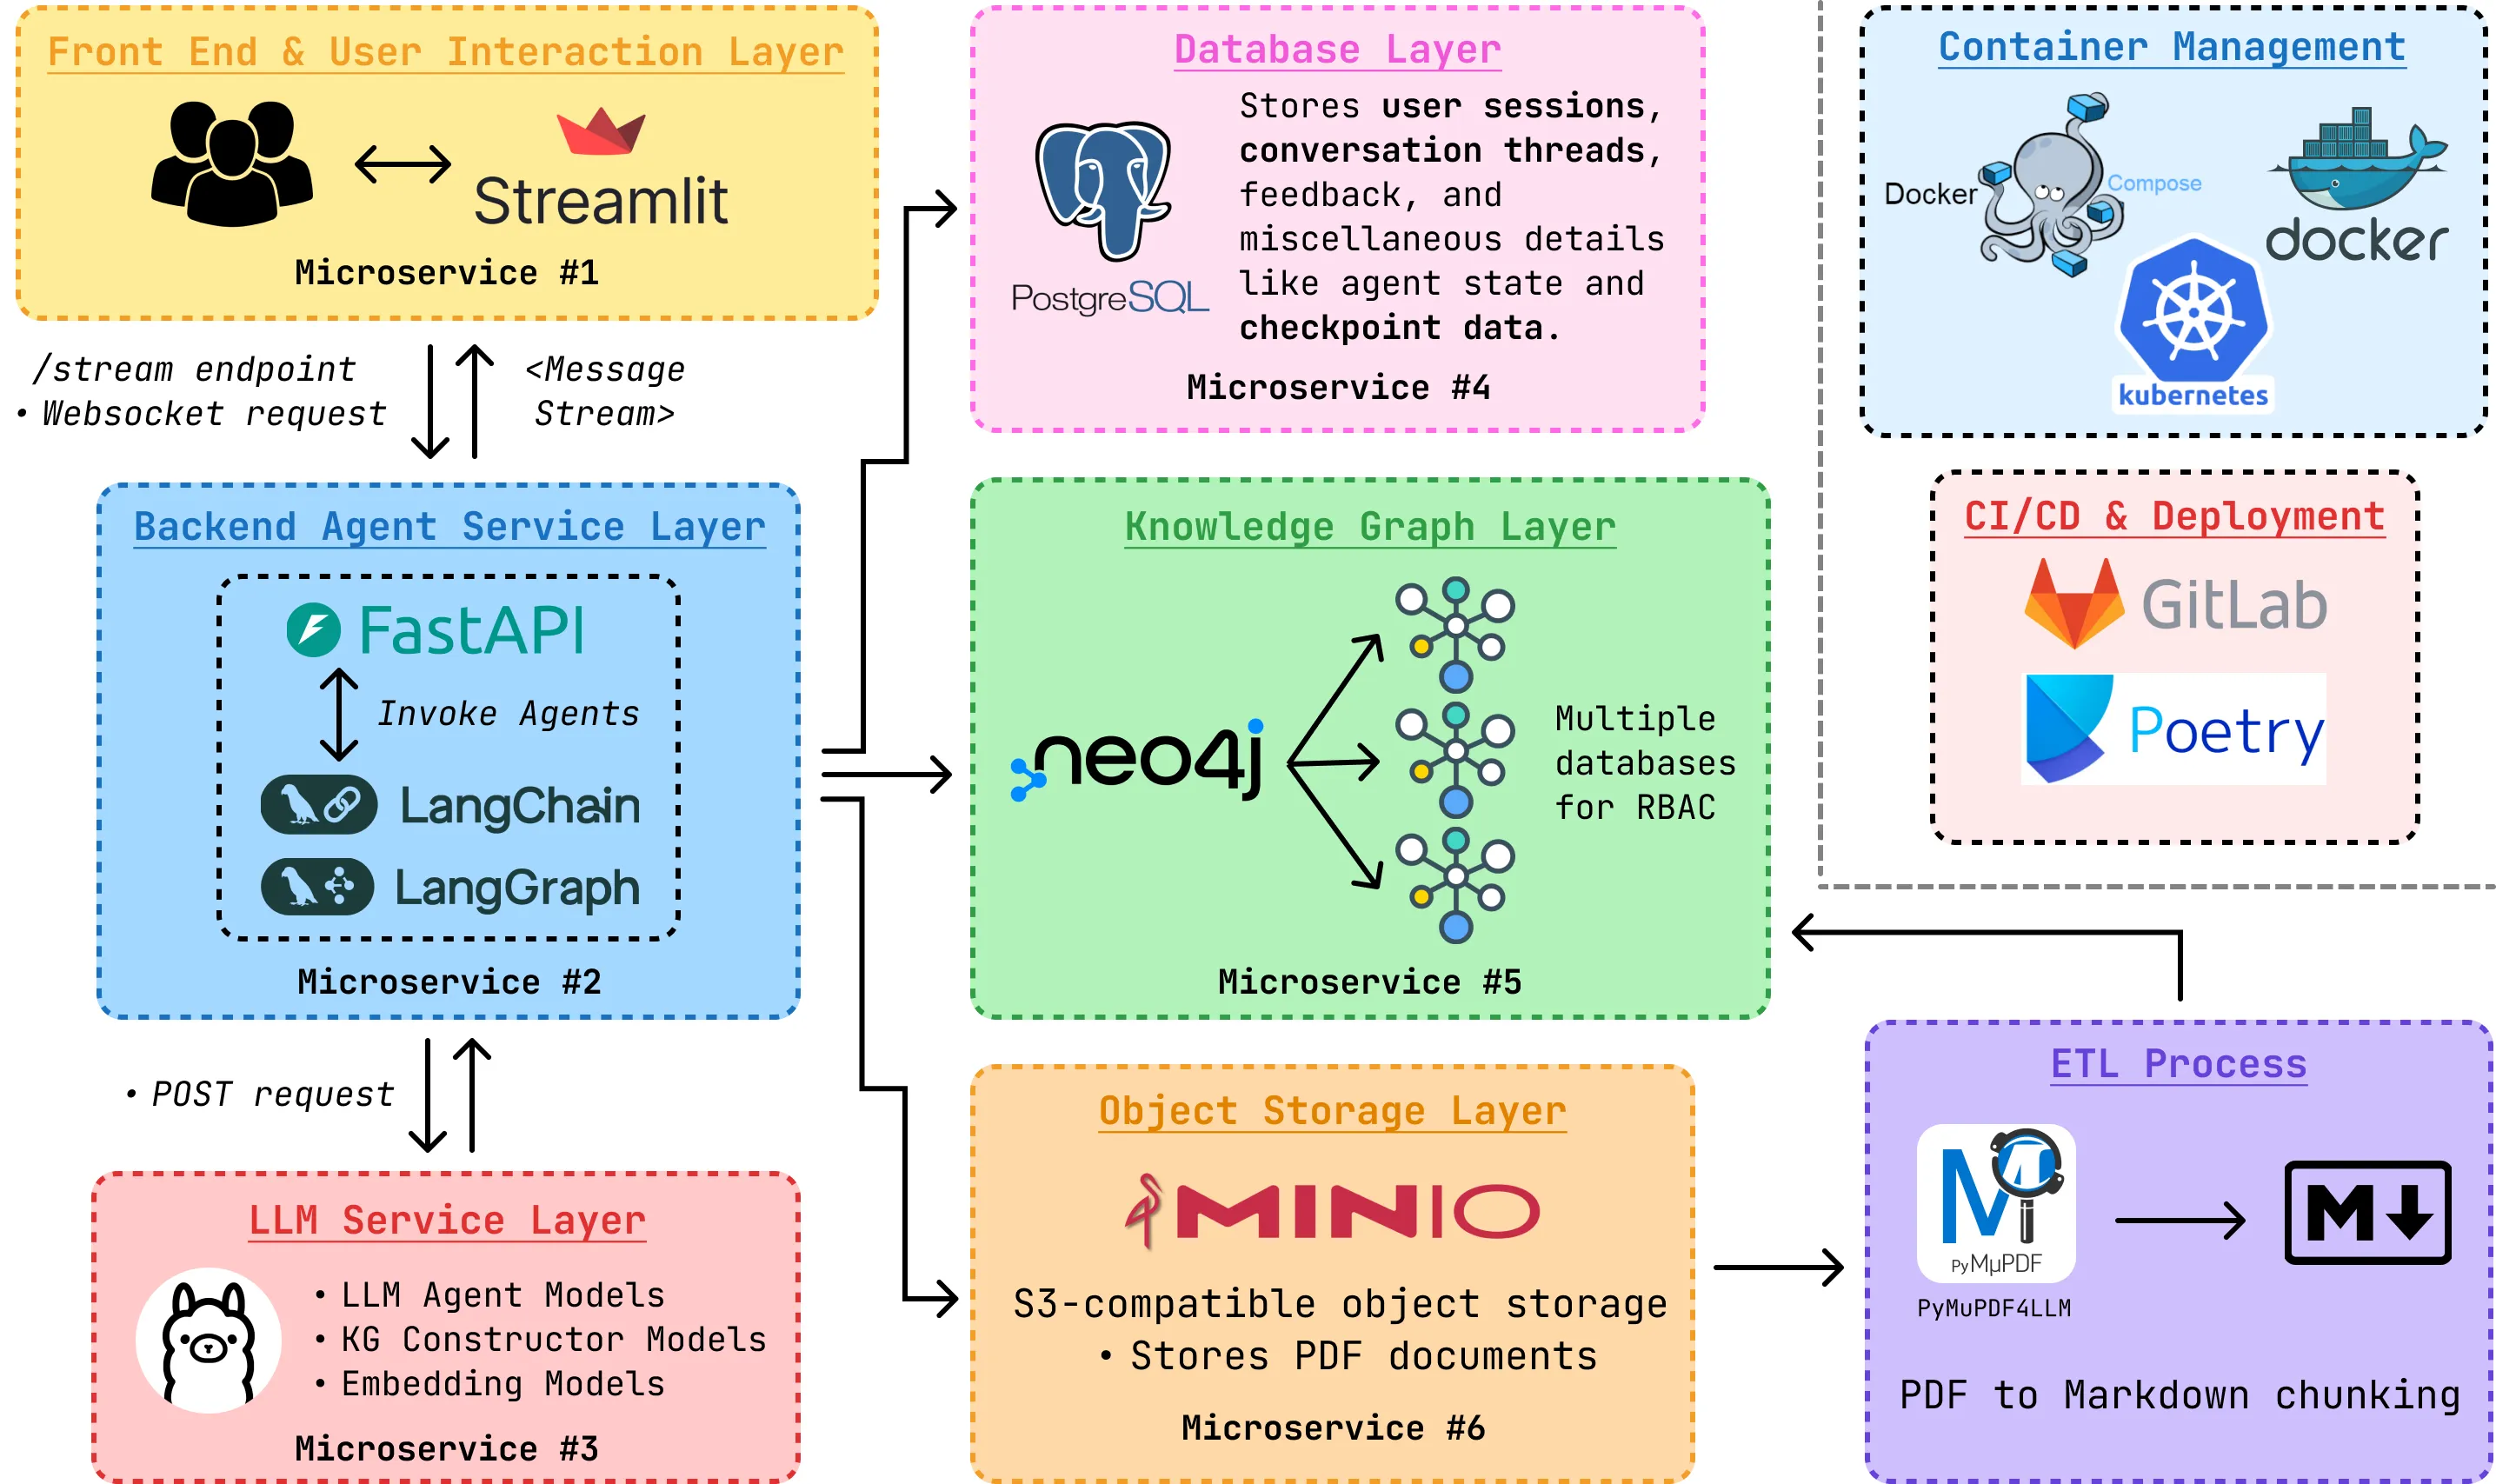
- Fully containerized with Docker for on-premises hosting.
- LLM serving via Ollama (currently OpenAI API), with predefined structured output.
GraphMind Agent Architecture
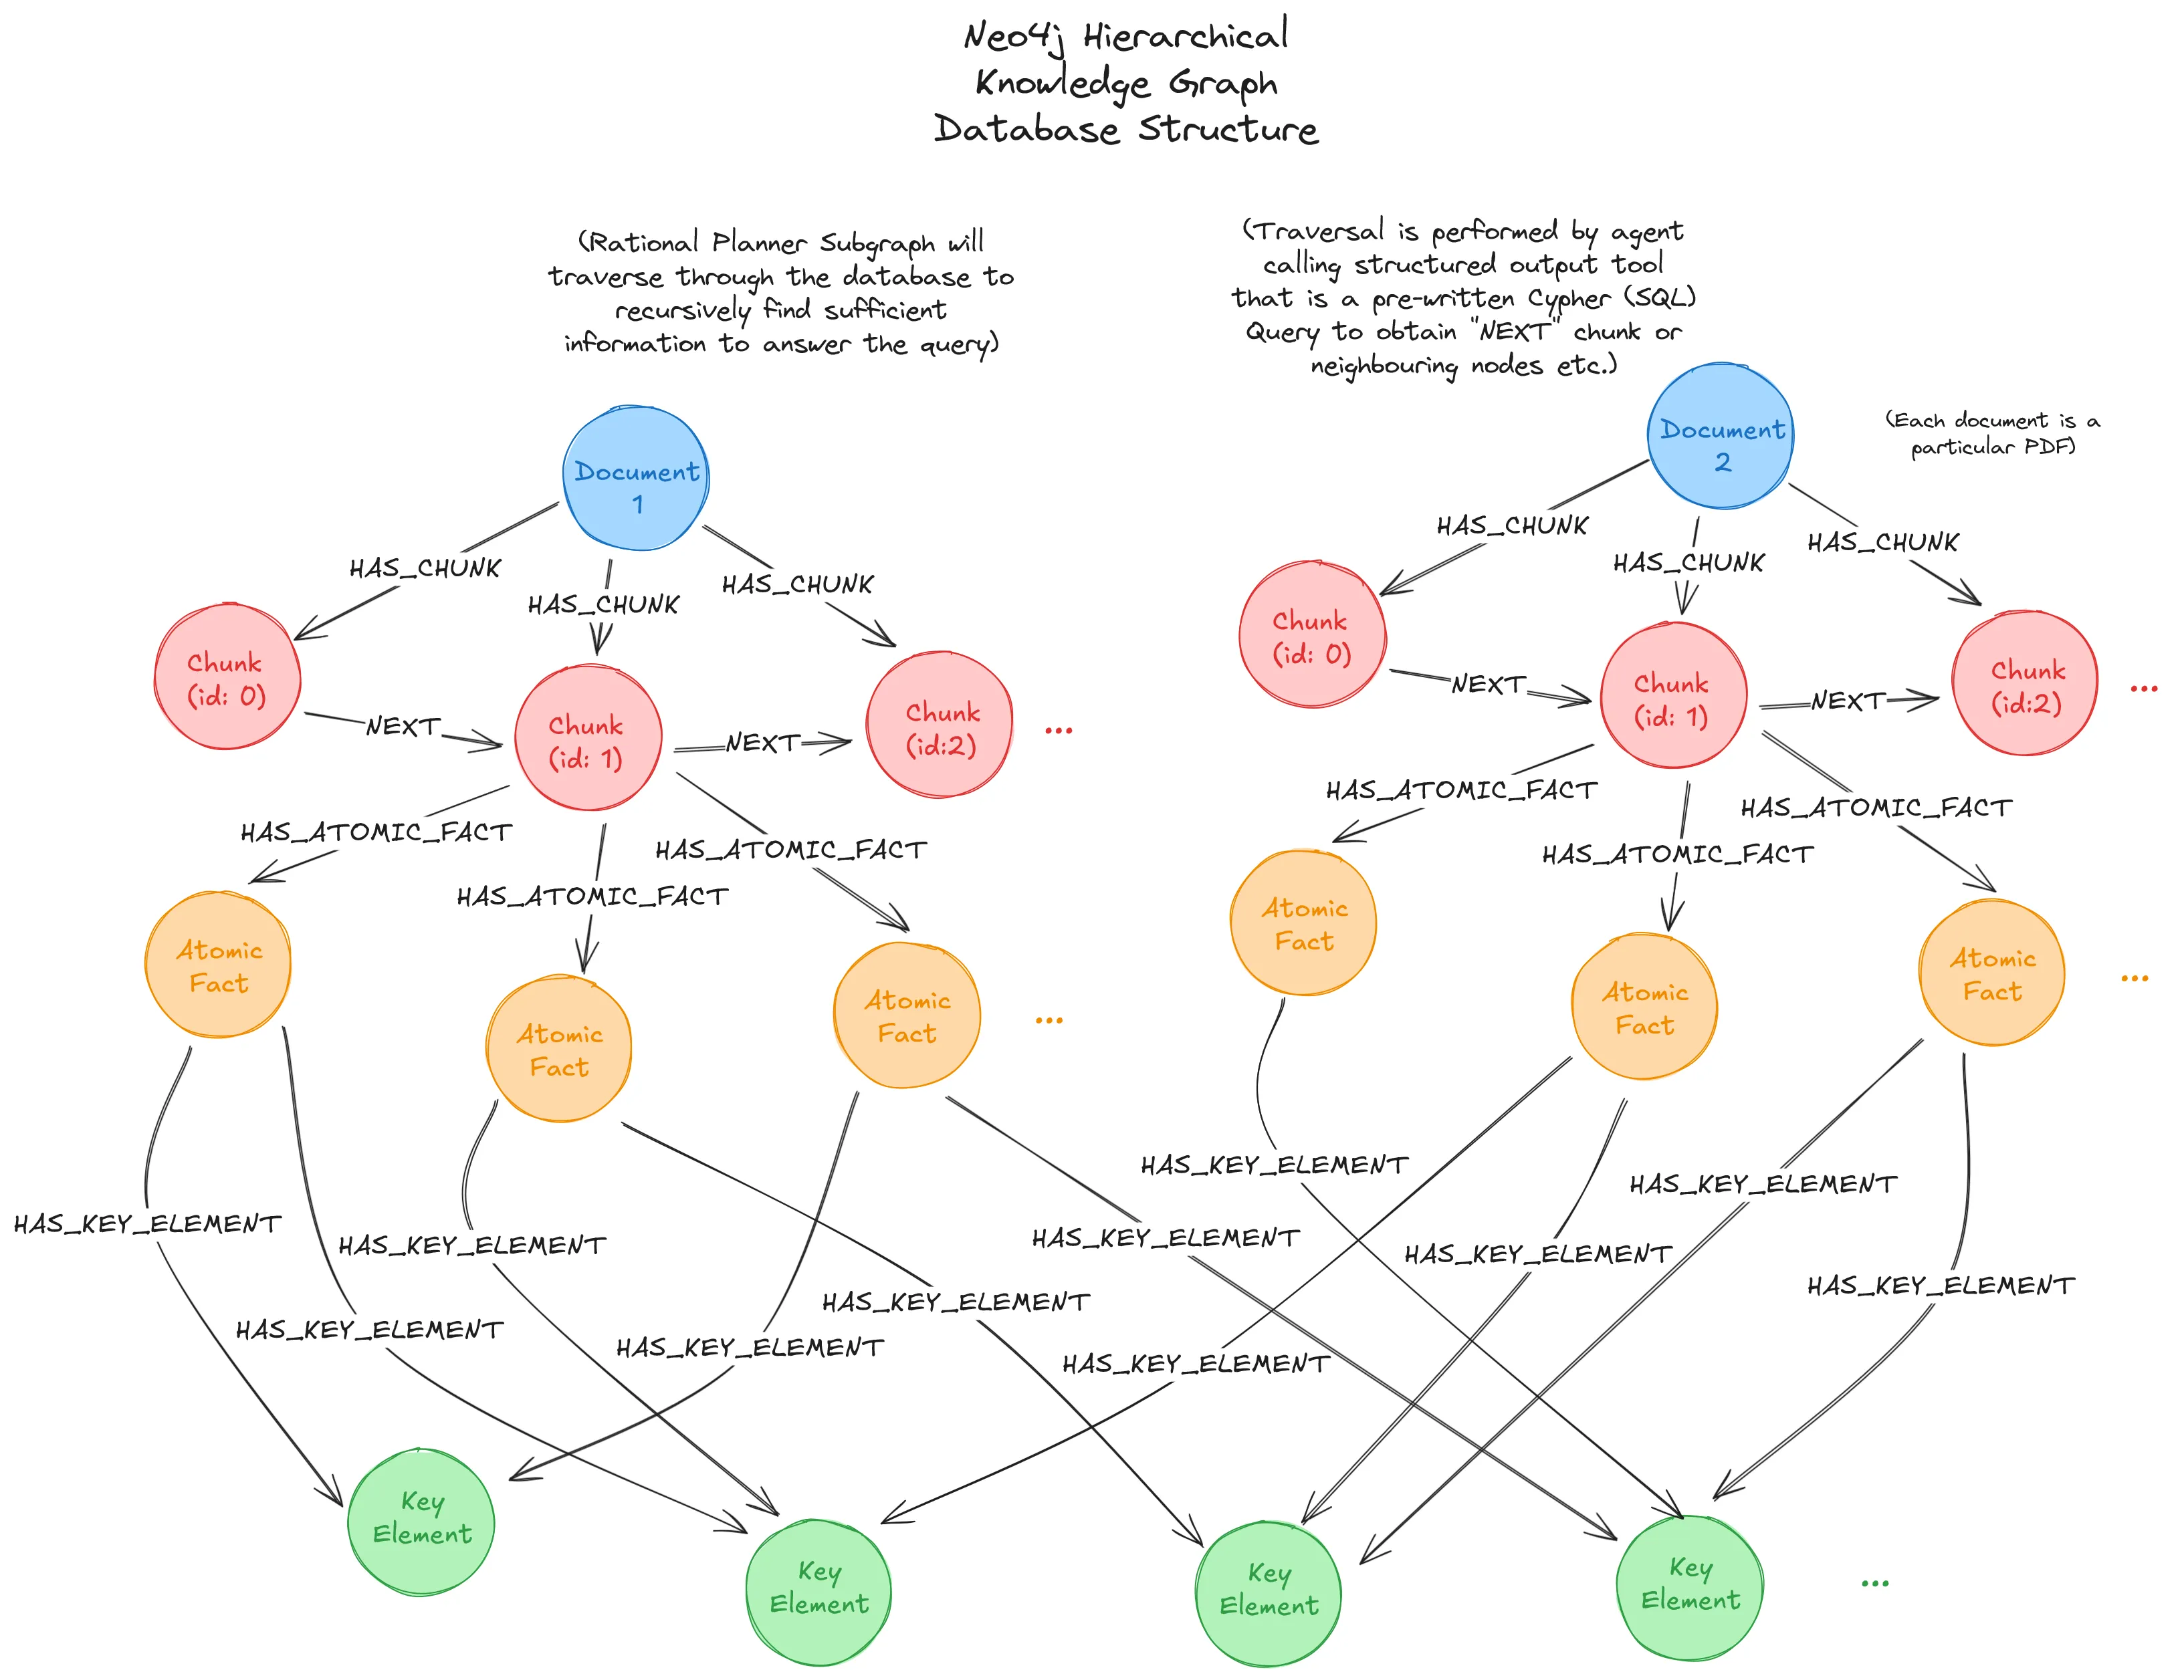
The underlying architecture behind the GraphMind Agentic Framework leverages the Graphreader paper. The diagrams below show the proposed implementation:
The Neo4j Knowledge Graph ontology is pre-defined and shown as follows:
Requirements
Ensure the following are installed on your system:
- Python 3.11 or later
- Docker & Docker Compose (currently not needed)
- Git
- uv (for Python dependency management [Optional], or install via pip below)
Clone the Repository
Start with cloning the repository into your local drive.
git clone https://github.com/michael-hoon/graphreader-agent.gitcd graphreader-agentContainer Setup
Note: Current version does not have docker-compose setup yet, have to manually setup containers for now. Requires Neo4j and MinIO S3 images from Docker hub.
Neo4j Container
Start up another terminal instance. Pull the official Neo4j image from the docker hub repository:
docker pull neo4jStart an instance of the database:
docker run \ --publish=7474:7474 --publish=7687:7687 \ --volume=$HOME/neo4j/data:/data \ neo4jVisit the WebUI host on http://localhost:7474/browser/, and login with the default username/password: neo4j:neo4j. The UI will prompt you to set a different password. Save this for use in the .env file later.
MinIO Container
Run the following command (on another instance of your terminal) to start a container instance of the MinIO S3 object storage (automatically pulls the latest image). Remember to change the installation path of the cloned repository.
docker run \ -p 9000:9000 \ -p 9001:9001 \ --name graphreaderminio \ -v /path-to-your-installation/graphreader-agent/docs:/pdfdata \ quay.io/minio/minio server /pdfdata --console-address ":9001"Visit the WebUI host on http://127.0.0.1:9001/ and login with the default credentials minioadmin:minioadmin. Change your username/password if required, and remember these details for the .env file later.
S3 Bucket Creation
Create a bucket and name it appropriately (e.g. graphreader-docs), without any of the features selected. You should see an option to ‘Browse Files’, select it and upload the two sample PDF files from /graphreader-agent/docs/ or your own personal PDF files.
(Optional) Verify Containers
Verify that all relevant containers are running:
docker psSetup Instructions
1. Set Up Virtual Environment
On the first terminal instance where you cloned the project repository, create a virtual environment in the graphreader-agent directory with uv and activate it:
pip install uv # ignore if uv is already installed on systemuv sync --frozen# "uv sync" creates .venv automatically
source .venv/bin/activate
2. Configure the .env file
Copy the .env.example file and customize it:
cp .env.example .envEdit the file accordingly. You will require your OpenAI API key, Neo4j database and MinIO S3 storage details from before.
Running the Application
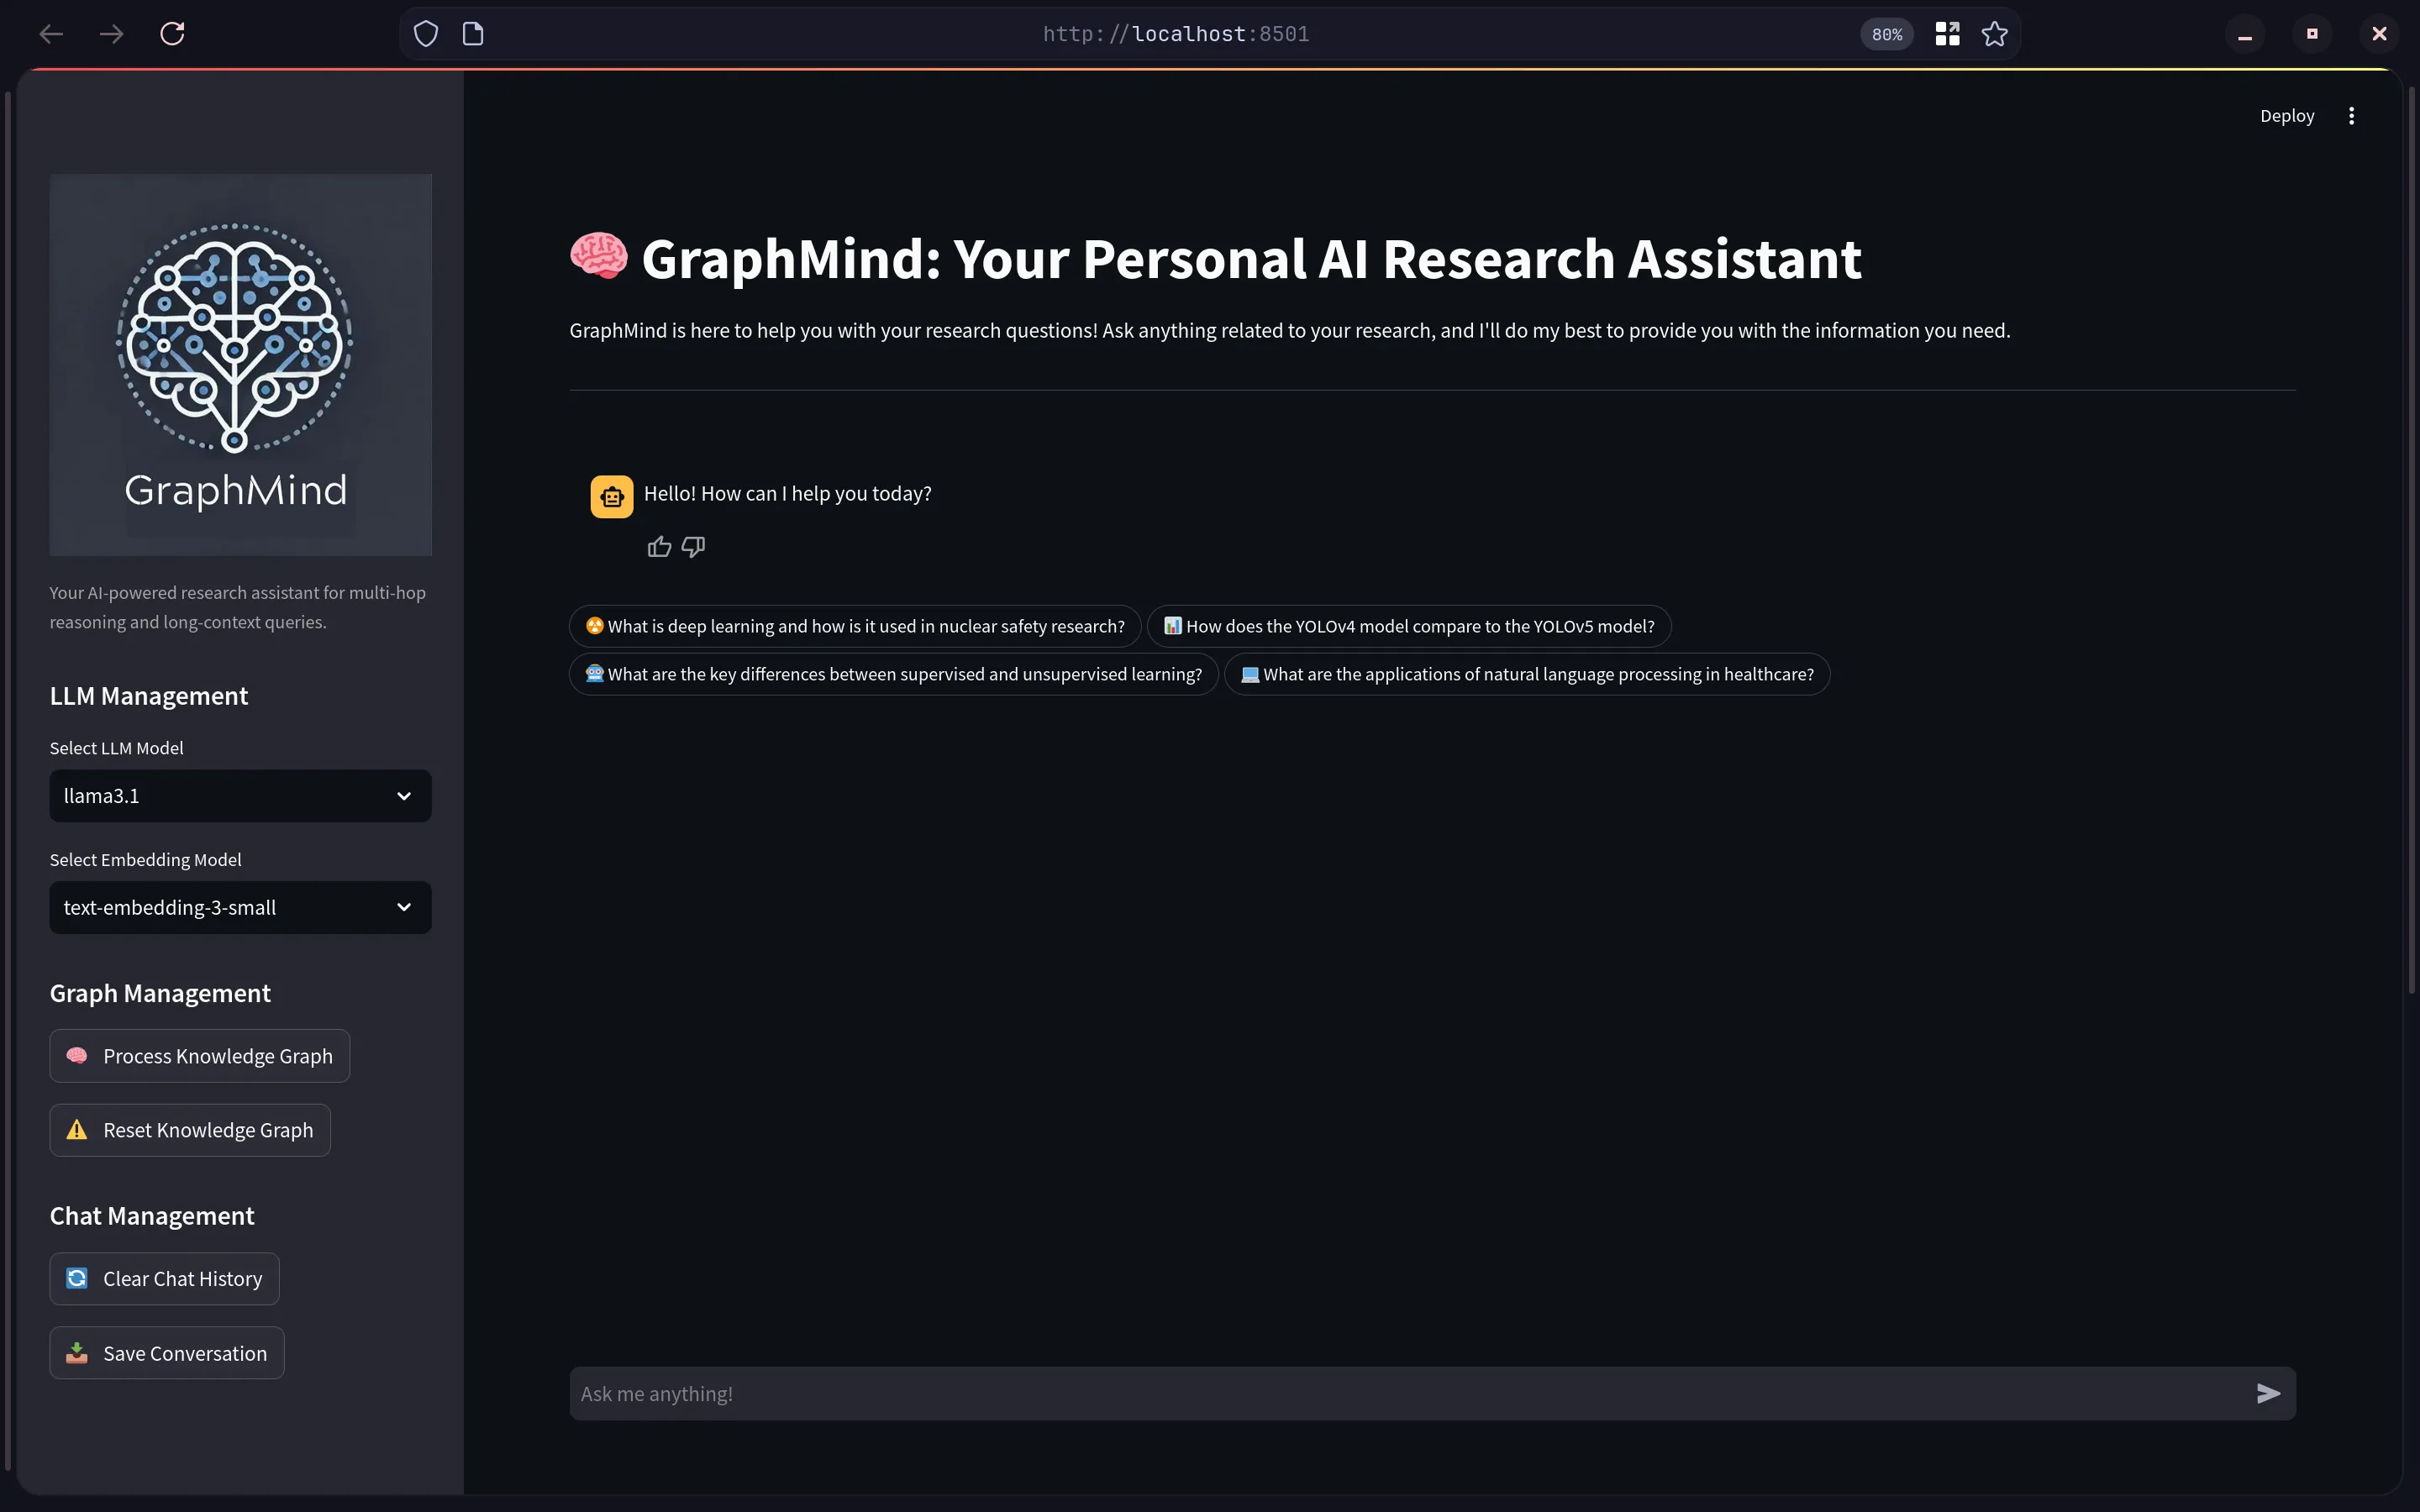
- Start the Streamlit frontend:
cd /src/streamlit_appstreamlit run app.py-
Access the app in your browser at http://localhost:8501.
-
On the sidebar, select the “Process Knowledge Graph” option to run the agent and process your PDF files into the Neo4j database. You can now go to the Neo4j Web console to see the resulting Knowledge Graph.
✨ Interact with the GraphMind assistant and analyze your PDF research corpus. Ask any question!
✨ Give feedback on LLM answers and export conversation history on the “Chat Management” tab in JSON format, with human feedback tracked.

Known Issues / Future Updates
- Currently no functionality for choosing different models on sidebar (config file WIP).
- Ollama structured output still having issues, using OpenAI API for now.
- PostgreSQL integration failing due to issue with tracking session states.
- Agent implementation needs improvement by rewriting certain agents as tools instead.
- Agent “thoughts” not yet configured properly in streamlit containers, rewriting agents as tools might help. Rerunning streamlit instance removes the container too.
- FastAPI not integrated yet for Multi-user support on deployed platform
- Containerisation not configured for graphreader-agent code.
- Container management with Kubernetes not yet set up.
- Monitoring/Observability platforms (Grafana) not set up as well.
References
← Back to projects